For some time now WebStorm has supported ECMAScript 6 (a.k.a. ECMAScript 2015), the future standard for JavaScript. While its features get more and more support in modern browsers and runtimes (see the Kangax compatibility table), to deploy your ES6 code you still need to compile it to ES5.1, the current version of JavaScript.
In this blog post we’ll have a look at some of the options that WebStorm offers to help you with this task.
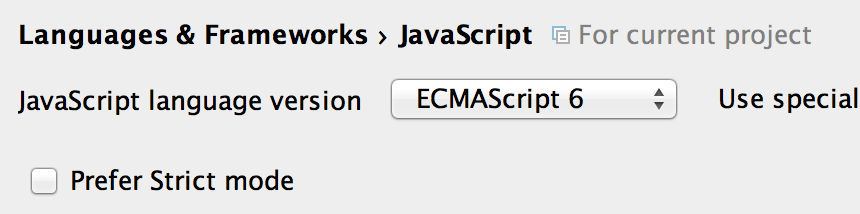
But first things first: set ECMAScript 6 as the JavaScript version in WebStorm’s Preferences (Languages & Frameworks | JavaScript).
WebStorm will start providing smart coding assistance for ES6, including code completion, on-the-fly inspections, navigation for modules and classes, and more.
At the moment Babel and Traceur are the most commonly used transpilers. You can configure and use them via WebStorm’s File watchers. This approach is good for compiling files on the fly for some experiments and debugging. For production-ready code, it might be worth using these transpilers in your build process — and WebStorm can also help you here too
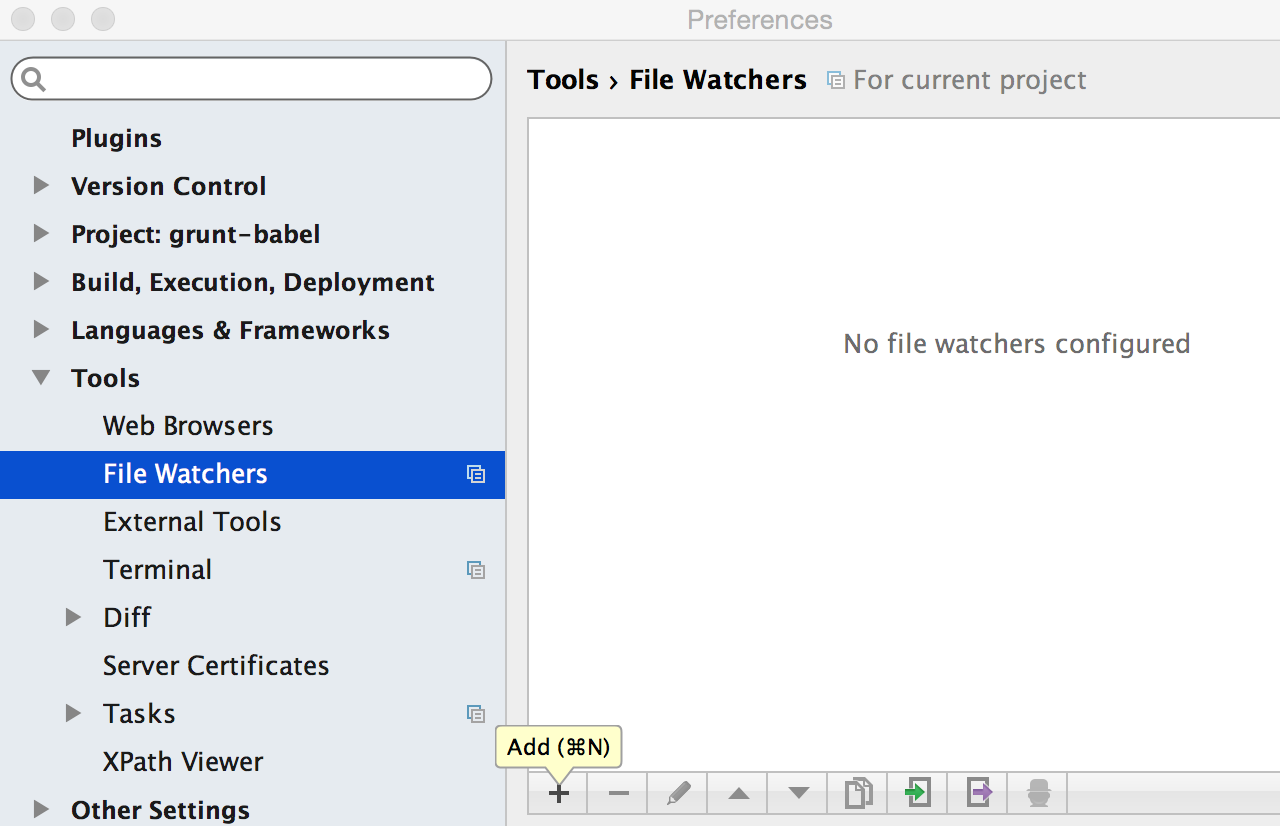
Setting up File watcher
File watcher is a WebStorm built-in tool that allows you to automatically run some command-line tools on file changes. For Babel and Traceur WebStorm has pre-configured File watchers. Let’s see how to enable them.
File watcher for Babel
Install Babel globally on your computer via npm:
npm install -g babel
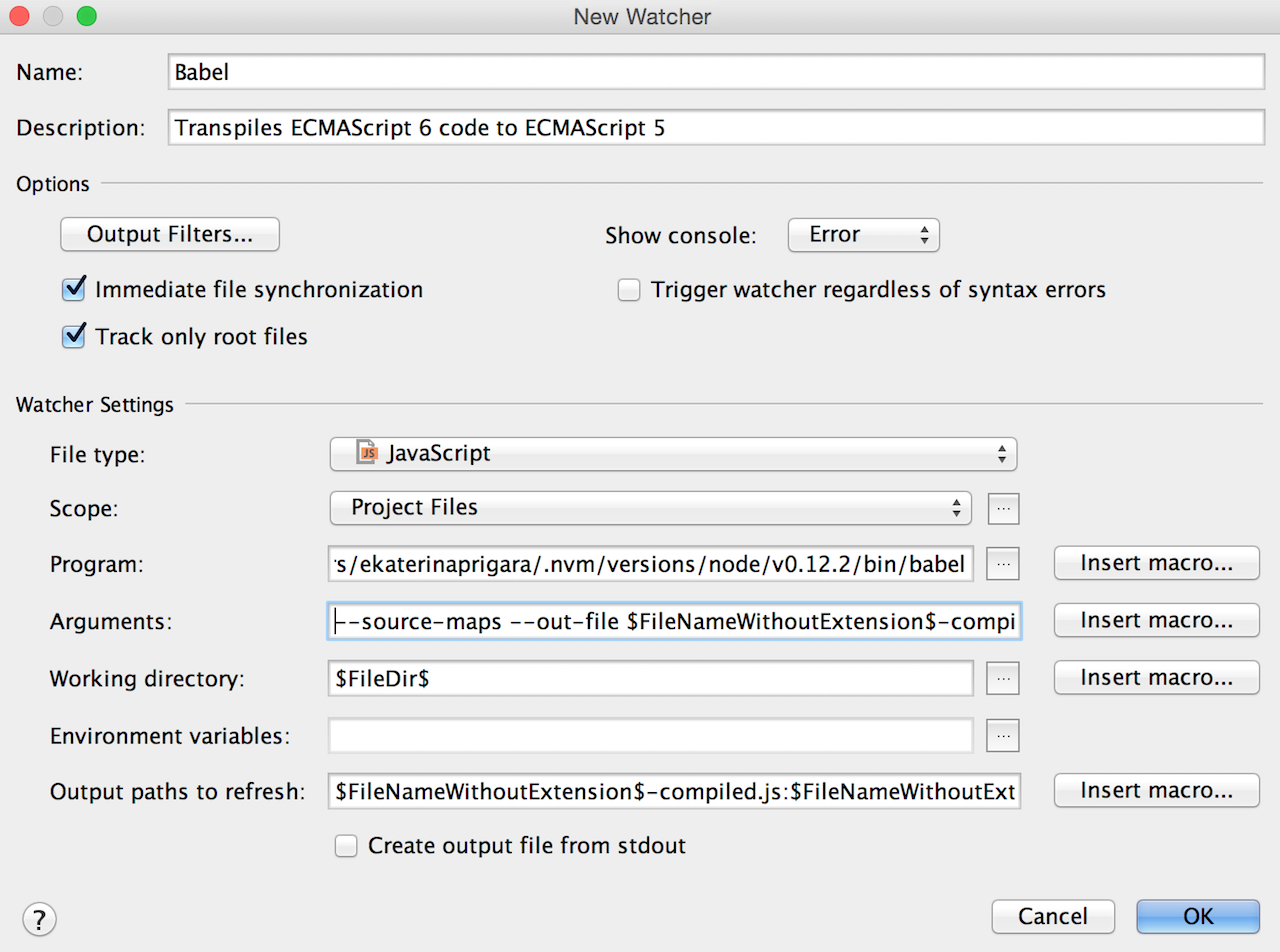
Now go to Preferences | Tools | File watchers, click + button and select Babel file watcher from the list.
In the File watcher configuration, specify the path to Babel CLI. On Windows it has to be an exe, bat, or cmd file.
All other Watcher settings are predefined, so it is now ready to use. With this default setup, compiled files will be located next to the original files.
Of course, you can modify the configuration to better fit your project needs.
Configuring File watcher
Here’re the settings that you can modify in the File watcher:
Files — specify the file type that the watcher will “watch” for you and run the program.
If you use some custom file extension, e.g. .es6 or .jsx, check that it’s associated with JavaScript file type in Preferences | Editor | File types.
Scope — select the scope the watcher will “watch.” By default the scope includes all project files; however, you may want to exclude your test files or some other files that you want to edit without triggering the watcher. You can create a new Scope and set the exclusion rules in Preferences | Appearance & Behavior | Scopes.
Arguments — this is where you can specify the options for Babel CLI.
With the default configuration in WebStorm, the generated ES5 files and source maps will be saved next to ES6 files with “-compiled” added to the file name.
Working directory — the directory where the program is executed. By default that’s the directory of the file.
Output paths to refresh — in this field you should specify the path to the compiled files (it could be a directory where the files are saved or the files themselves, separated with colon). The IDE will watch these paths for external changes and make sure that the changes are synchronized with the project.
Visit WebStorm’s Help portal for more details on File watchers.
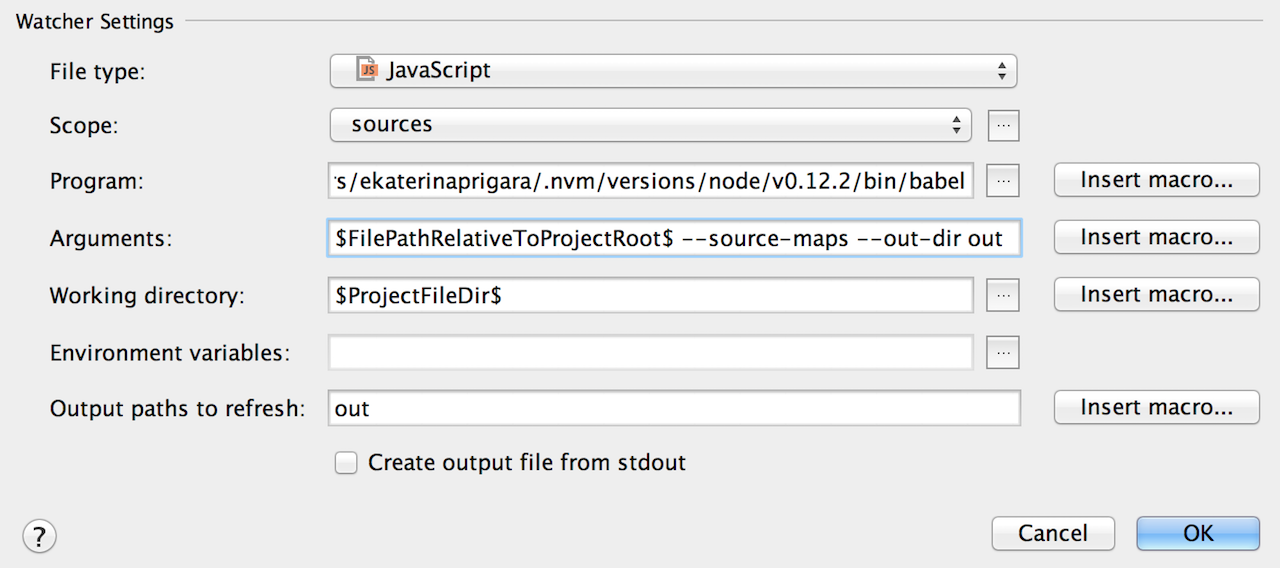
Let’s see how we can configure Babel File watcher to make it save all the compiled files in out directory. We’ll need to:
1. Create a new scope that excludes out directory.
2. Change the arguments to: $FilePathRelativeToProjectRoot$ —source-maps —out-dir out (so that the files would be compiled and saved with their parent folders in out folder)
3. Set Working directory to the project root: $ProjectFileDir$
4. Set out as Output paths to refresh.
File watcher for Traceur
You can install Traceur compiler via npm:
npm install -g traceur
The default configuration for Traceur’s File watcher locates generated files in the out directory. Just specify the path to the Traceur executable, and you’re ready to go.

Setting up Task runner
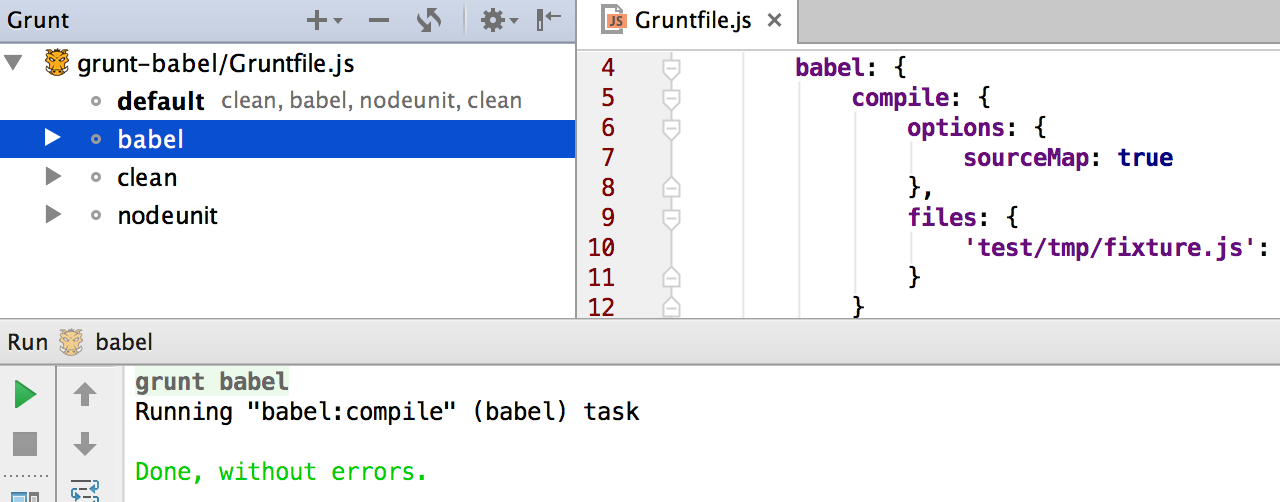
As mentioned earlier, you can set up Babel or Traceur as a task for your build tool or task runner. Since WebStorm provides integration with Grunt and Gulp, you can start the task for traspiling your ES6 files from the Show tasks window.
Read about using Babel with Grunt or Gulp.
Read about using Traceur with Grunt or Gulp.
Make sure the project’s gruntfile.js (or gulpfile.js) is ready and all the required dependencies are installed (as well as the task runner itself). Then press Alt+F11 to see Run Grunt/Gulp task popup or open Grunt or Gulp tool window, select the task for transpiling you’ve created, and double-click it or press Enter to run.
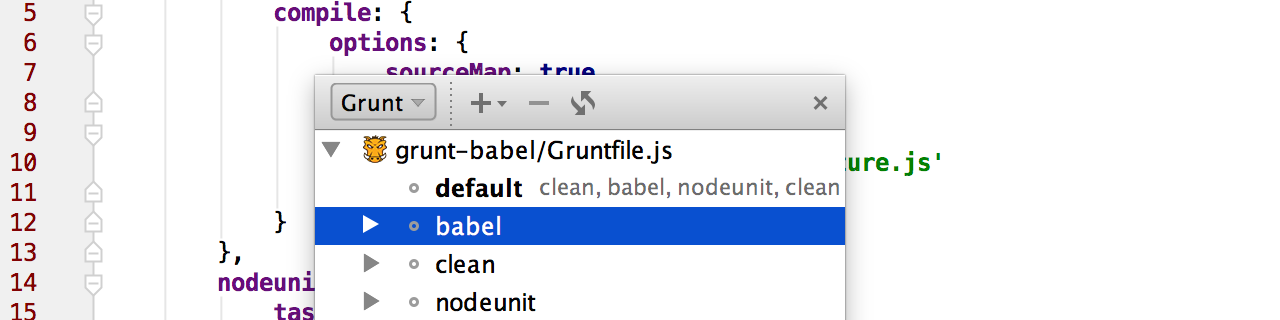
You can create a new Run configuration for your task and start it with the Run… action (Ctrl-Alt-R on Mac or Crtl-Shift-F10 on Windows and Linux).
Apart from choosing a transpiler, there are some other choices you need to make to start using ES6, like choosing a module system. We recommend consulting Axel Rauschmayer’s excellent blog post on Deploying ES6.
Develop with pleasure!
– JetBrains WebStorm Team